Making sure that we understand the differences between a raster and a vector are key to having
print ready artwork.
Here we will learn about:
– Raster image
– Vector Image
– How do these two images differ?

Raster image:
Raster images/graphics are known for having non-line artwork. This artwork is usually digitized
photographs, scanned artwork, or detailed graphics. Raster images are composed of individual
pixels of color, which in turn seem like individual dots of color; but, when viewed all together
the dots create a painting. However, just like a photograph; when a raster image gets blown up
in size the image begins to look more rough and less smooth. This is because a raster image
consists of a bunch of different pixels that create the image/artwork.
Examples of raster files include JPG, GIF, and PNG. Using programs like Photoshop and Gimp are
optimal when editing and creating raster images. Determining how to use a raster image
depends on the size and quality of the image. This is usually based on the amount of pixels
there are in an inch, also known as pixels-per-inch or ppi; and also the overall dimensions of the
image; or pixels.
The quality becomes higher when the ppi and measurements are higher. The default
requirements for images are usually 300 ppi or higher. If raster images are scaled to super large
sizes they lose their quality and become blurry/pixelated. Raster images can not be scaled up,
yet can be scaled down.
Vector image:
Vector graphics are visual images that are created from geometric shapes such as points, lines,
curves and polygons. The artwork is made based on mathematical formulas. You can scale a
vector image to whatever size, small or large, and it will not lose its quality.
Vector images are best for designs with simple colors. Compared to raster images that have
individual shapes with each shape having its own color; vector images cannot articulate
shadows and shading the way raster images can. You can however mimic the idea, but it will
require you to rasterize some of the vector image.
Vector images are best used for logos, product artwork, illustrations, and signage. This is
because vector images will not lose their quality no matter the scaling; and they are best for
printing.
Raster and Vector differences:
We now understand the pros and cons of both a vector and raster; so, let’s take a look at the
key comparisons.
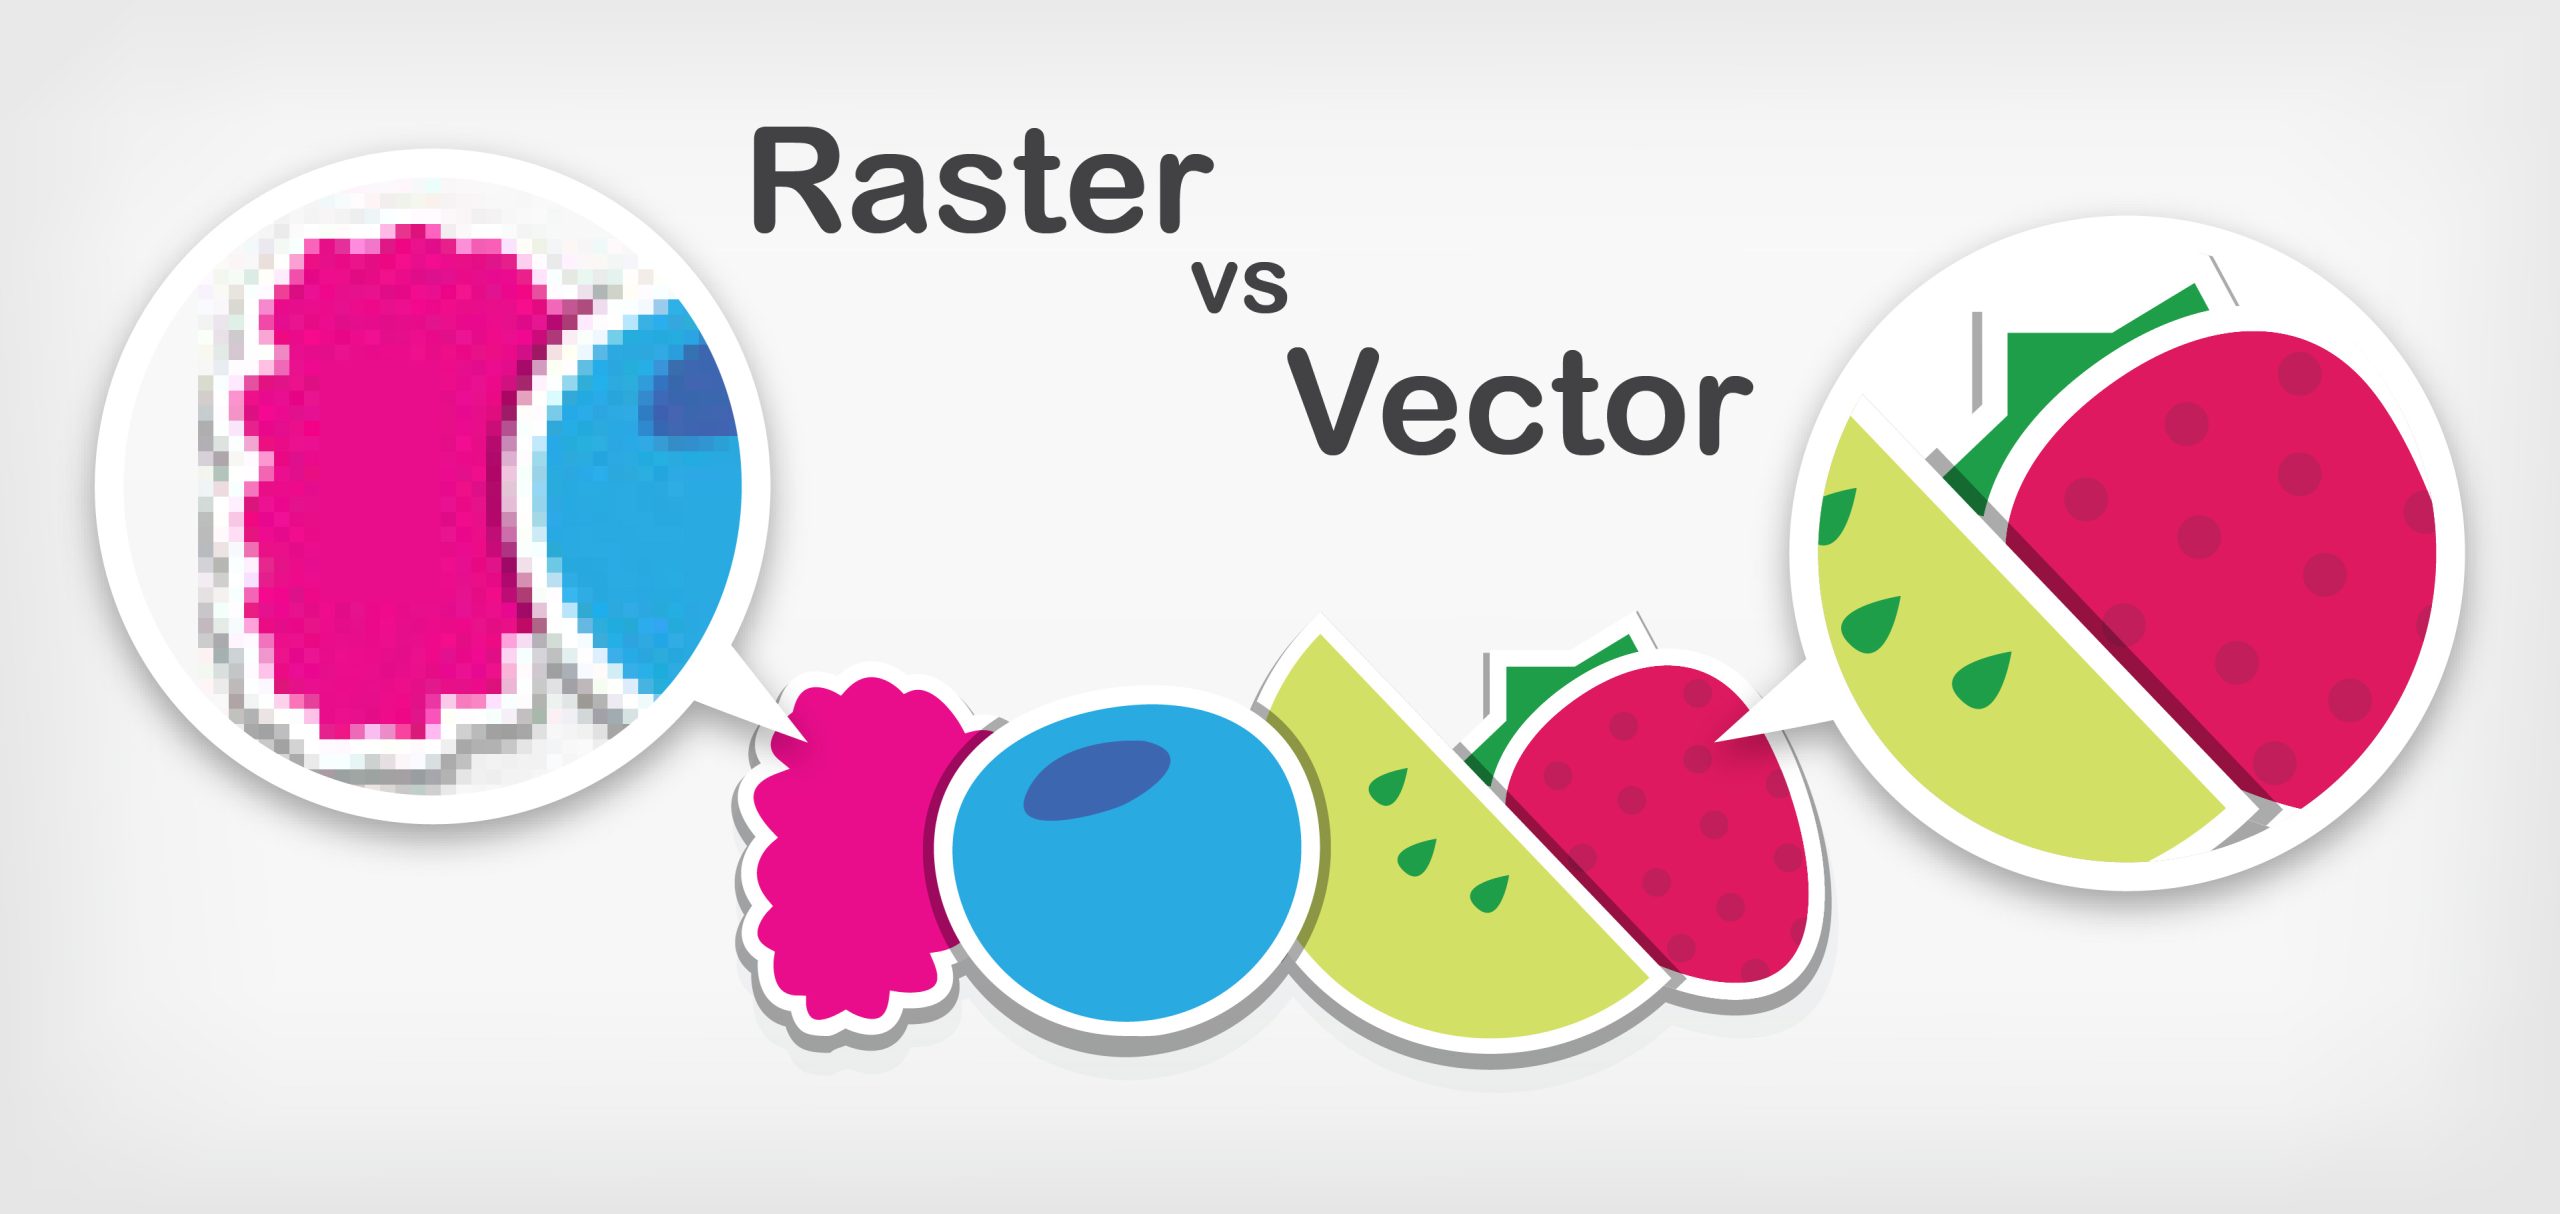
Raster images are made-up of colored individual pixels that help create an image; and when
scaled too large the image can look blurry or pixelated. Because a vector image is a bunch of
mathematical equations forming an image or artwork; it is much easier to scale up and down,
for the equation will continue to recalculate to a proper size, thus leaving the image crisp no
matter the size.
To understand the differences from two similar images, all you need to do is zoom in to an
image and if it continues to look pixelated the more you zoom in then it is indeed a raster
image.
Vector images have the ability to match a photograph, but lack the color blends, shading,
shadows, and gradients that make a true representation of a photograph. However, a rasterized
image is very capable of creating true to life graphics; with color blends, shades, gradients, and
shadows.
Raster files are usually JPG, GIF, PNG, TIF, BMP, and PSD; while vector files are .ai, .eps, and .PDF.
Raster images are best utilized for photos, and vector images are best used for logos,
illustrations, and signage. Whether your artwork is a vector image or a raster image; make sure
that your artwork will be sufficient both in a file and printed.
Converting Text to Outlines:
When using programs like Adobe Illustrator, it is important to convert your text lines before sending over your files. This will ensure that you have print-ready artwork, as well as cut-ready artwork.
In Adobe Illustrator either click on “Type” and go down to “Create Outlines”, right click on the text and look for “Create Outline”, or you can select the artwork and press Ctrl + Shift + O. Once your text is outlined and print/cut ready, save the file and send it over.
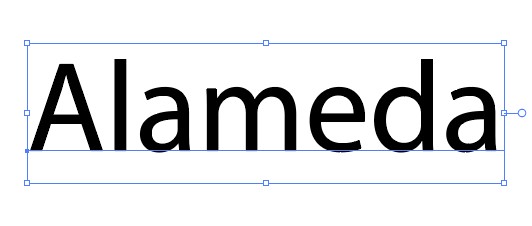
Before
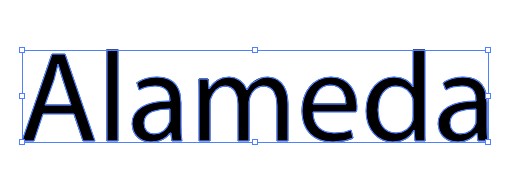
After