Banner Finishing Options
JUNE 24, 2017| SpeedPro of SF PeninsulaLittle League season is in full swing and with Summer’s arrival, festivals and outdoor events will be plentiful. If you haven’t done it yet, maybe it’s time to start thinking about your outdoor signage and display graphics. Here are a few different banner finishing options to ensure you get the best use of your banner for this season…and the future.
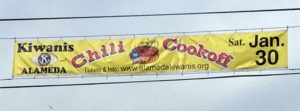
Taped Hem & Grommets
This is SpeedPro’s standard banner option. A taped hem is where 1″ of the banner material is folded over on the entire 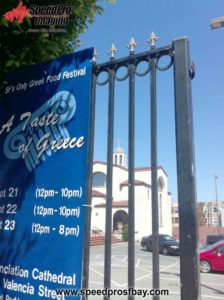 perimeter and adhered to the backside using a very strong double-sided specialty tape. This gives extra strength and a clean look around the edge so that it doesn’t tear. Along with the hem, we punch metal grommets that are placed in the corners and usually about every 2 feet along the perimeter of the banner. Depending on needs, the SpeedPro team can space grommets anywhere from 12″ apart to 3 feet or more. Grommets allow for easy attachment to multiple surfaces and we offer brass, silver, and black options.
Sewn Hems
Sewing used to be the “go-to” edge finishing for most banners for many years until the quality of banner tape got so good it made sewing only necessary on larger banners or ones needing webbing, reinforced corners or pole pockets (read on for information about those options). Our sewing is done with a double-stitch, walking foot industrial Seiko machine using strong, nylon thread.
Webbing
Webbing is a flat, nylon reinforcing material used for banners that are subject to high winds and long-term outdoor use. The webbing is sewn into the hem of the banner and then we punch the grommets on top of this which makes it more durable and reduces the risk of tearing due to winds. We’re happy to build banners to meet local specifications, but since they vary from city to city, be sure to check the local regulations for finishing requirements. Many jurisdictions unfortunately still have archaic codes that demand wind slits (more on that below)
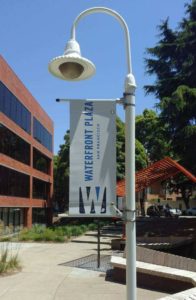
Pole Pockets
Pole pockets are sewn when a banner is being suspended from a horizontal pole or pipe. Usually, this is hardware that’s attached to a light pole or wall, but sometimes it may be a pole for a “parade” banner or indoor stand. Typically, we fold over the banner and sew along the edge to create an opening for a pole to be inserted. Pole pockets can be added on just the top or just the bottom or both like in the image below. As us for help on pole pocket dimensions to they’re neither too big nor too small for the diameter of the pole or rod.
Wind Slits
Wind slits are cuts throughout the banner material that look like half circles and are mistakenly thought to allow wind to pass through the banner. In fact, wind vents or slits do very little to prevent banners from becoming “sails” in the wind and mostly cause premature wear and potential tearing. Unfortunately, wind vents are still required by many municipalities in their antiquated codes, so if asked, we’ll certainly do them. For more information on why those of us at SpeedPro in San Carlos don’t recommend wind slits, check out our blog: “Look! No Wind Slits in These Banners.”
If you’re ready to get started with your banner or would like more information, give us a call at (650) 662-5450 or click here to request a quote or consultation.